BLOG!!!

So we’re going to give this a shot.  Seems like a good idea to have a place to put my most current project, chat about it a little bit, show some pictures.  I feel like people often start these and then at some point just stop updating them once they get too busy, but we’ll see.  

Sun Deck- Summer 2025

This was a quick little project that I did for a friend of mine.  He wanted to extend a roof over his pack deck, but do it in transparent panels so it would still get sun.  I was kind of constrained by having to match the existing roof, which was fine, but also I don’t think using 2×4’s for ceiling joists is ideal.  If I was just doing the whole thing from scratch, I’d use at least 2×6, but also I don’t think it’s a big deal.  The biggest problem wasn’t so much that I don’t think they’re strong enough, but that it’s basically impossible to find a straight 12′ long 2×4.  If I was trying to do this really cool (and money was concern, because in this case it was), I think I’d look into what kind of engineered product would be appropriate for an exposed exterior application, but this is just made out normal framing material.  I didn’t take as many pictures as usual, but this is also a lot more straight forward than what I usually do, so this will be a pretty quick entry. 

      I started by cutting away the Hardi siding and adding a ledger board.  I then cut out the 4×4 post in the corner and replaced it with one the height of the wrapped 4×4  from the existing roof. Next, I bisected the 4×6 beam over the middle of the existing 4×4 and installed my 4×6 beam. Because I would be wrapping the new 4×4 to mimic the existing one, I didn’t have to do anything to hand railing as I’d just cut it to size with my oscillating  tool.

Next, I added my joists.  I have to admit I had never cut a birds mouth before (thats the little notch in the joist that lets it sit level on the beam), so there was a little bit of googling and test pieces.  (By the way, I’m a huge advocate of test pieces and templates, as opposed to just math and measuring and assuming you’re right, because there’s a decent chance you aren’t.) Once these were in place, I attached them to the beam with hurricane ties.     

Now I had to tediously go through and add a ton of blocking between the joist.  This blocking basically creates framing that runs parallel to the house, and on this framing sits these little wavy firing strips that the roofing sits on.  I’ve seen this done more simply by people attaching 2×2 to the top of the joists, but I had to do it the way I did it to stay consistent with the existing roof line.  Also, this looks better.  

Next, I used some window flashing butyl tape that went over the ledger board onto the house sheathing, and slipped my 4″ by 4″ galvanized flashing up under the siding and house wrap.  Then it was just a matter of attaching the roofing panels to the wavy furring strips with these screws that have a little rubber gasket.

With the roof attached, and a little bit of monkeying around to flash the corner, I wrapped the posts, ripped some pieces to mimic the column trim of the existing post, and reattached the hand railing.  My friend was stoked, and I thought it turned out nice as well.  As a bonus, every day was bring your dog to work day, and there were about a thousand insane squirrels  around to keep her company.

Porch Stairs- Spring 2025

The commute to this job was really convenient as it was at my house.  The porch stairs at my house had been falling apart basically ever since I moved in so I contacted my landlord and asked him if he wanted me to rebuild them, and he did.  I was looking forward to this project because I could make it exactly as I wanted to without too much consideration  as to how long it would take.  There were  few things I wanted to try that I might be hesitant to do for a client because I didn’t know how long it would take or how well it would hold up over time, so this seemed like a great opportunity to do some experimenting and then I could monitor how well it would wear.  

After demoing the old stairs, the first thing that I realized was that only a few inches of the stringers would make contact with the cement sidewalk that they would need to sit on, so I made a pretty crude form that I filled with as many rocks and cement chunks as I could find so that I didn’t need to go crazy with the cement. 

Next, I had to fur out the wall that I would be attaching the ledger board to so that it was square to the house, which it wasn’t. I held the furring strips in place with epoxy and then drilled through them and the cement wall behind them and epoxied threaded rod into the wall to attach the ledger board.

The old staircase had three stringers, which wasn’t enough, so I went with four.  Another challenge with this was that the landing slopped pretty precipitously, so I had to scribe the bottoms of each stringer to the landing.  

The two things that I wanted to do that I was unsure was actually a good idea was I was going to clad the thing in 1×6 cedar with mitered corners, and I was going to make my own treads by gluing up 2×6 (which was a mistake, I should have gone with 2×8 because I later had to add another couple of inches to them to make them deep enough).  Exterior miters, like if you’re wrapping a post, usually don’t hold great, but I thought maybe if I epoxied them I might have better luck.  Esthetically, it’s what I wanted it to look like, wrapping around from the riser into the side.  First, I did some framing to create a void where the newel post would slot into, then a little patch on the foundation with some hydraulic cement, and then I clad all the vertical surfaces in 1/2″ plywood, to which I would be attaching the “siding” and risers with stainless steel 18g brad nails and construction adhesive.  If you’re doing a project like this, made of cedar and exposed to the elements, all you’re fasteners need to be stainless steel because if not they will rust and they will stain the wood.  

I started at the bottom and ripped each piece to the height of the riser (after scribing the bottom row to the ground), gluing them up with biscuits to make sure everything plained out.  I used wood glue between the boards, but used epoxy at the miters.  There was no real way to clamp the boards, the the joints aren’t quite as tight as I would have wanted, but each piece was cut to size with my track saw, which makes a really nice cut, so it was pretty acceptable. This was a fairly tedious process, between the ripping to size and getting the miters just right, and frankly it’s one of the things I’ll be interested to see if holds up.  

Next up was the stair lighting. Did I mention these stairs were getting lighting.  Because these kinds of exterior lights are almost exclusively low voltage nowadays, they need to run into a converter that is then plugged into a standard outlet.  But I wanted the lights to operate off of a light switch next to the one that operates the porch light, so I wired a new switch that operates an outlet in my garage that the converter would be mounted next to.  As an added bonus, there is now and extra outlet in the garage that operates off of the switch, so you can plug your Christmas lights into it and have them turn off and on from the switch.  Pretty nifty!  I don’t even care about Christmas lights, but if it’s going to be that easy, might as well.  

If you already have an outlet at the ready, low voltage lighting is about as easy as it gets.  A lot of converters also have a timer option and a photo cell, so you can tell it when to turn on every day or just have them turn on when it gets dark.  Basically, you run the low voltage wire, then the lights have a wire coming out of them that has a clamping mechanism with little teeth in it.  You just clamp onto the wire, the teeth pierce the wire, and then you connect the wire to the converter and that’s it.  I went back and forth on whether I should get a light for every riser or every other one.  I chose every other, because I didn’t want it to be too bright, but that was a mistake.  I mean, it’s fine, but honestly when you do every other, the treads that aren’t directly illuminated are in shadow, but the ones that are lit up have ruined your night vision, and while I wouldn’t say it makes it sketchy, it actually a little bit does.  It looks really cool, but it’s job is to make the stairs safer and I’m pretty sure I’ll add two more at some point.  Like I said, it’s really easy.  The only thing required is having a converter with enough umph to do the job, and the one I got was bigger than I needed so no problem.

As I mentioned, I was making my own treads for this.  I initially used 2×6 because that would in theory be 11″ wide, but after planing the edges to make them flat enough for glue up, I lost enough depth that I ended up adding another 1 1/2″ to each tread.  I was also concerned about the exposed end grain and wanted the treads to integrate into the body of the thing in an elegant way, so I ended up adding an 1 1/2″ piece to the end of each tread.  I then routed a bullnose around the whole thing with a truly sketchy 3/4′” radius bit that barely fit in my router, like there was less than a 1/16′” gap between the bit and the router base plate.  This is another thing I wonder if it will hold up.  This is where having a Festool Domino instead of just a biscuit joiner would be really helpful.  I pre-stained them before installation.   

The hand rail was also to be a bit of an experiment.  First, the newel post would slot into the bottom tread and be attached by the previous blocking I had installed.  I routed out the base of the newel by 1/4″ on each side and built a corresponding slot for it to sit in.  After installing the first tread, I roughly cut out the area above that slot and then used yet another sketchy router bit, this time a 2″ long flush cut bit with a bearing on the end that would ride along the interior of the slot and flush it up perfectly.  I’d chisel out the corners that the bit couldn’t reach.  I realize this isn’t rocket science, but I was still really pleased how well this all worked. 

The final “experimental” aspect of these stairs is that I wanted the handrail to be built with a plow and fillets where the pickets are built into the railing, as opposed to the much more common technique of attaching a 2×2″ to the top and bottom rail and affixing the pickets to that.  The way I wanted to do it is common in interior applications, but in those circumstances the parts are all milled for that purpose, whereas I had to make my own, and the 2×2″ I was using is milled less accurately than it would be for interior use.  If I had a wood shop full of all the tools, this wouldn’t have been a very big deal, but I don’t, so there was some improvisation necessary.  I cut the plow with my track saw, making a cut every 1/16′” or so, and then cleaning out what was left with a chisel.  Not the most efficient way to do this, and I basically had to sand down each picket to size.  

And that’s about it! Like I said, I would absolutely have gone with one light per tread, and now, many months later, I can say that the stain has not held up to what I would have expected.  Did I not mix it good enough? Does it just suck? Is having your cedar exterior stuff consistently  look good just constant maintenance?  Not sure.  I’m going to re-stain it soon and see how it does through the winter.  Other than that, I’m very happy with how it turned out and wouldn’t really change anything else.  

I'm not sure sub-contracting is for me-Winter 2024

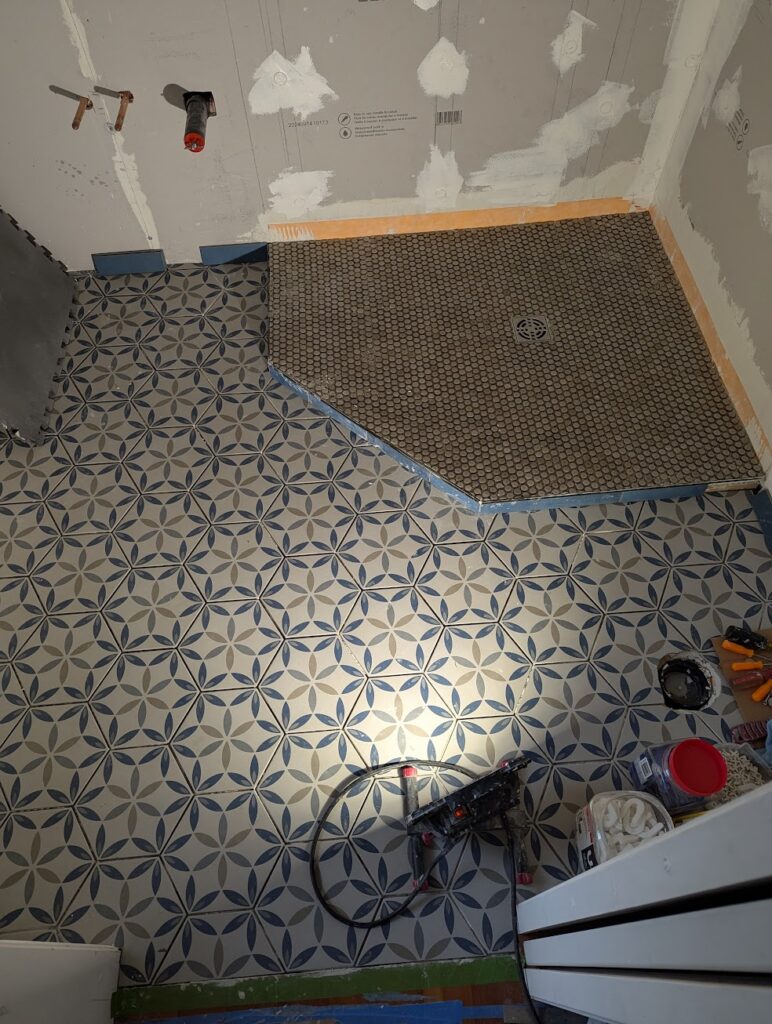
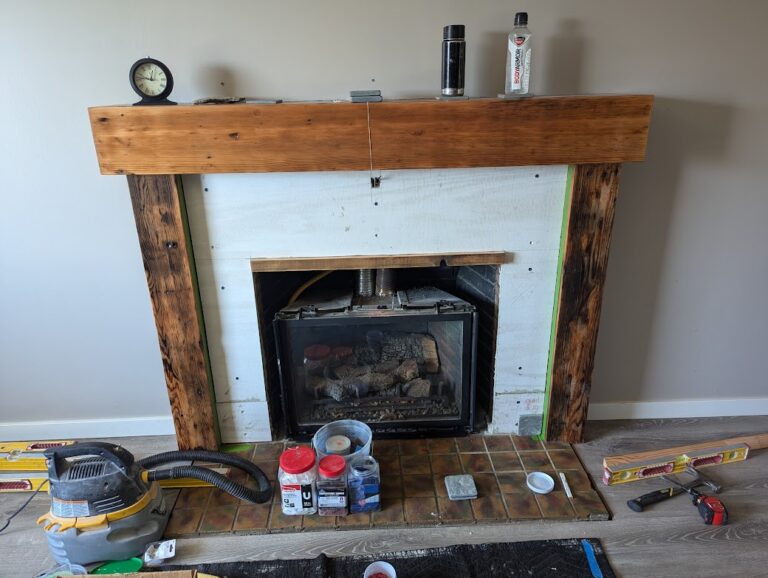
I’m not going to belabor this, just a quick note about how the work you do before you put all the pretty stuff on top is at least as important as the pretty stuff.  I agreed to do a tile job for a friend that has a remodeling company.  Because I’d worked with him in the past and consider him a quality carpenter that knows how to do things, I assumed that the prep work would be up to par and I’d just be doing tile.  I was wrong, The walls were neither plumb nor flat, and the floor wasn’t level or flat.  Those characteristics are non-negotiable. I had to spend days tearing apart the back wall to get it ready for tile, and because the floor was already set up for radiant heat, I was just going to have to deal with it the way it was, which I hate doing because now instead of laying the tile on a flat surface, I had to use varying amounts of thinset mortar to produce a flat surface.  You don’t know how unpleasant that is until you’ve done it.

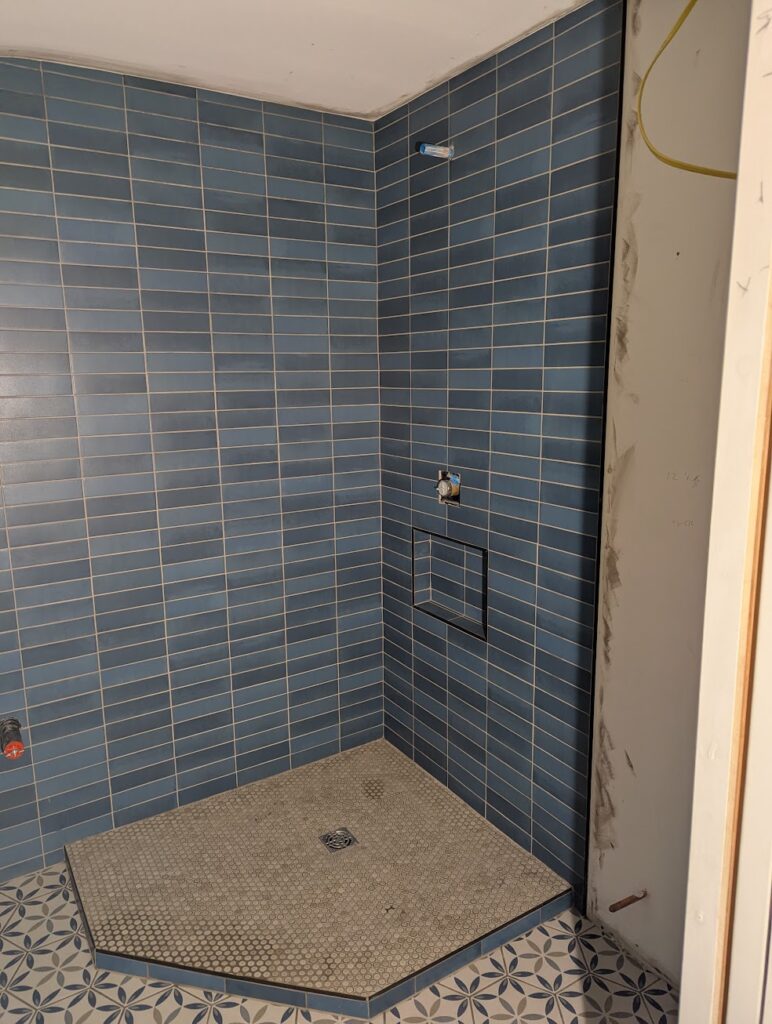
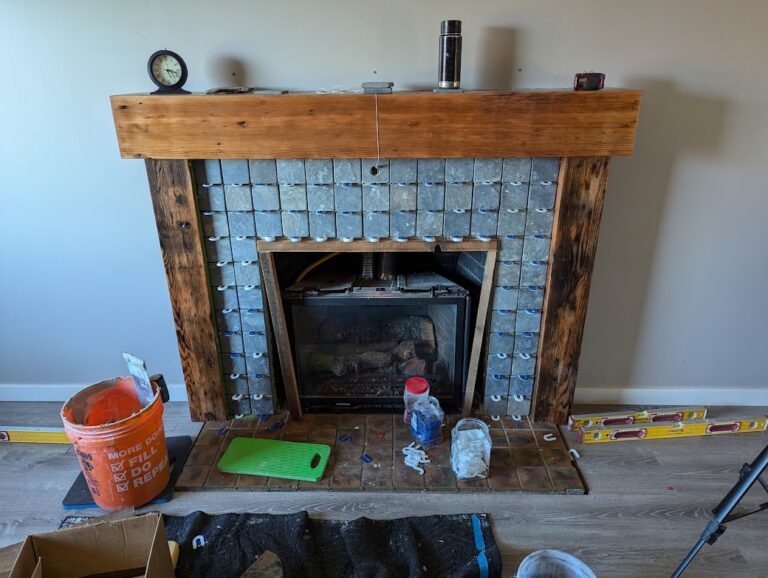
When I remodel a bathroom, or any surface that is going to be tiled, the first order of business is to get everything plumb, level and flat.  It’s not optional, it’s just the way it’s done.  Whatever time you take to ensure that will be more than recouped in the time saved when it comes time to tile.  Why is this so important?  For floor tile, a flat floor allows you to pick the appropriate trowel size for the tile your installing, spread a consistent amount of thinset mortar over the surface, and then simply lay the tile out with the desired grout line.  You don’t have to worry about one tile being higher or lower than any other, which creates a lip which is undesirable.  You don’t have to constantly gauge how much mortar is under individual tiles because it’s the same amount for each tile.  This was even more complicated by the fact that this was hexagonal tile. It makes it quicker, funner, and a better product.

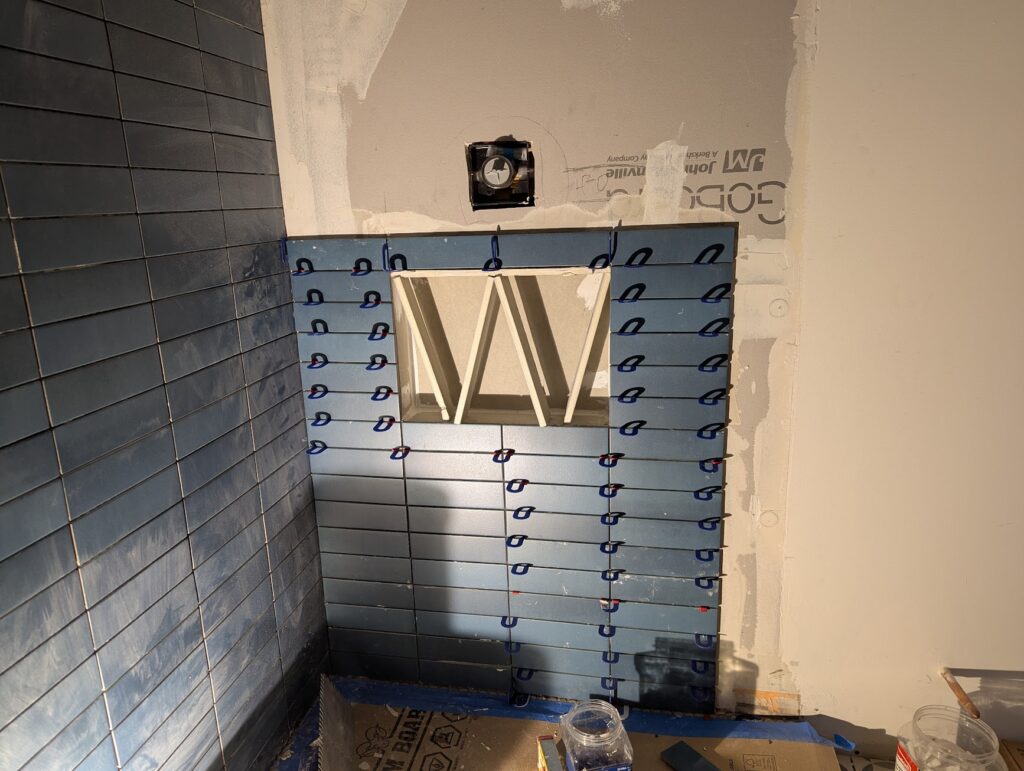
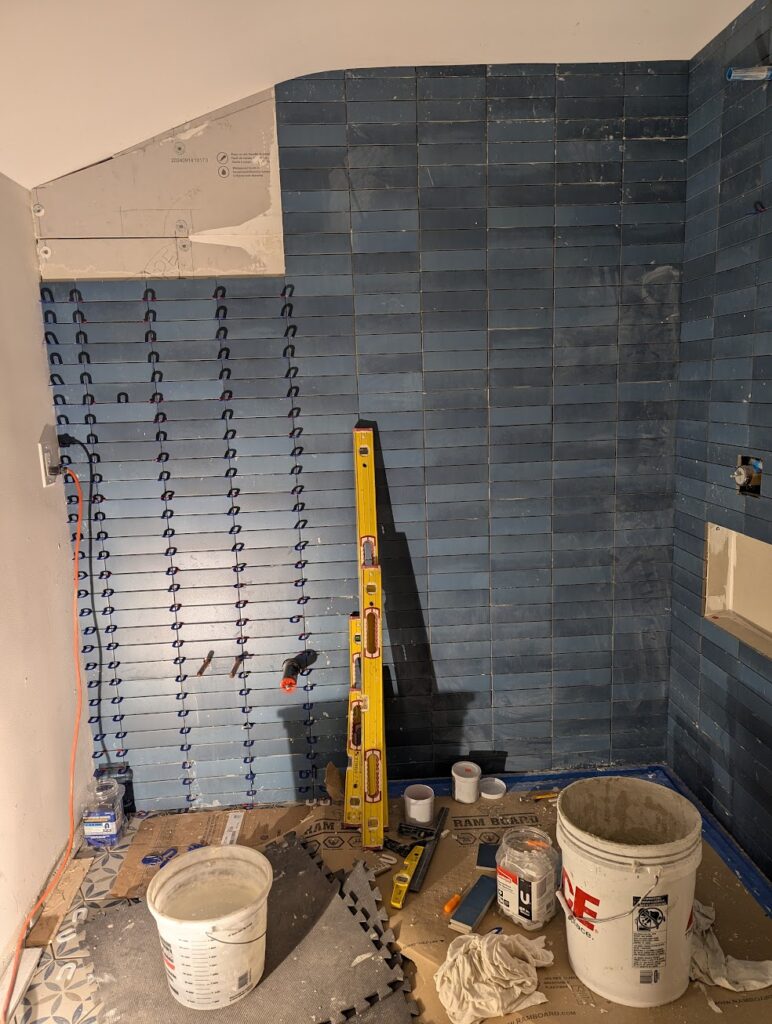
For wall tile it is arguably even more important to have a flat, plumb surface.  Take subway tiles for instance.  If one wall is plumb and the adjacent wall isn’t and you just stack the tiles on top of each other, the grout line will incrementally not match up. Even if it’s just 1/64″ off, in the matter of just four courses, it’s already and 1/8″ out, and will only get exponentially worse.  You can correct for this with little wedge spacers, but it’s time consuming and just looks worse.  You’ll end up having to do some of this anyhow because tile isn’t perfect, but it’s nothing compared to starting off with bad walls. 

      Another quick note about the wall prep.  Backer board traditionally comes in 3’x5′ sheets, like Hardi Backer or Durarock.  I don’t use either of those products anymore because they are hard and messy to work with, they’re heavy, and they are not waterproof, requiring a liquid membrane to become waterproof.  I long ago switched to various foam backer boards because they are light, can be cut with a utility knife, and are waterproof, and come in 4’x8′ sheets.  The board this guy used is called Go Board, which I’be used before and quite like, but he used the 3’x5′ sheets, which I try to never use.  Even if you get your framing plumb and flat, you’re still creating a circumstance where a hinge point can occur, and a subtle change of plane can happen.  Minimizing this will save you time, and you’ll have less seems to waterproof.  This was exacerbated in this instance because in addition to to the smaller sheets, he also didn’t stagger the seems, so that before I fixed it, the whole left side dipped in rather dramatically, which causes a problem because tile doesn’t bend.

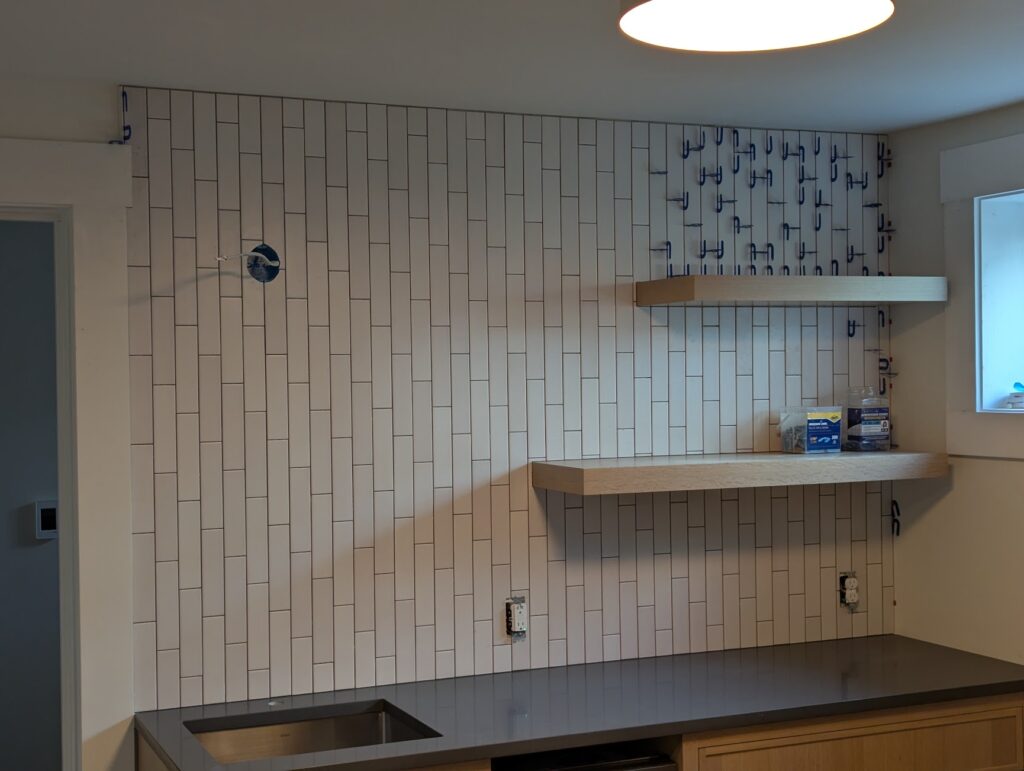
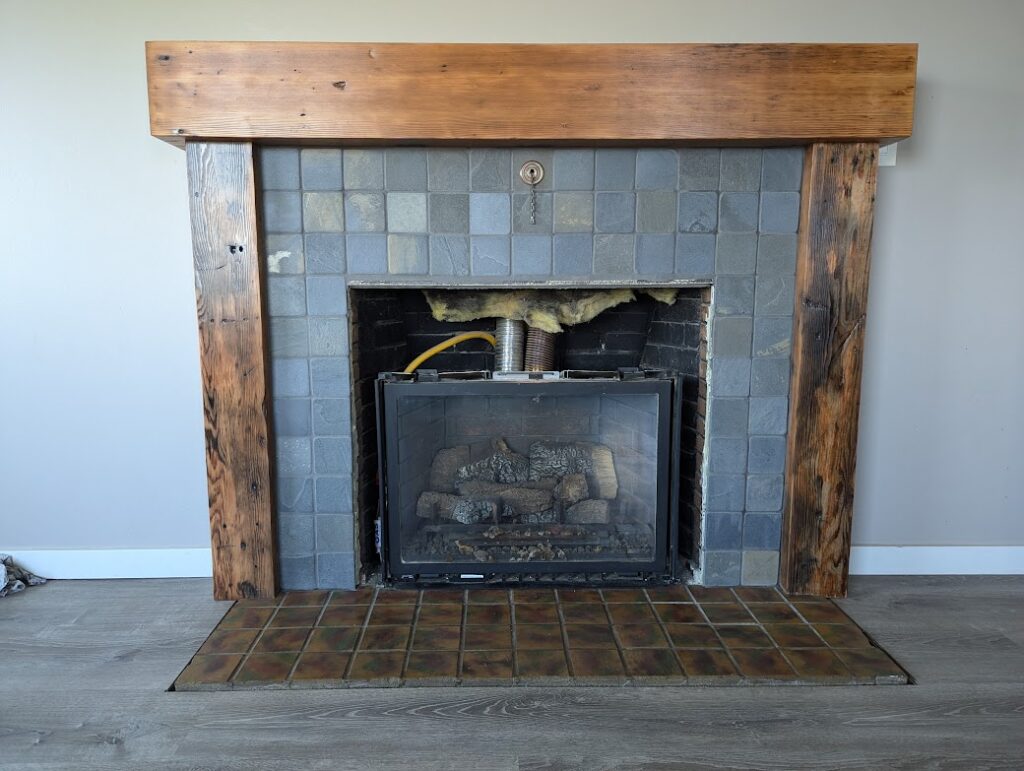
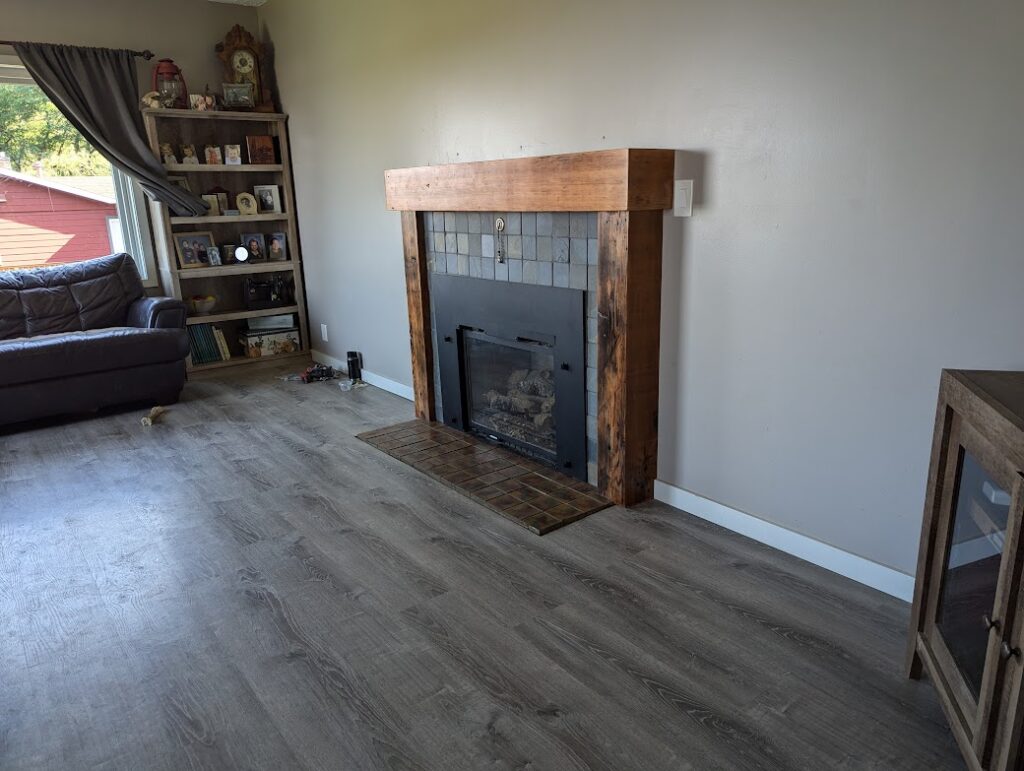
          It was a frustrating job, but I actually really liked the tile and it ended up looking pretty good.  I had never done a subway type tile that wasn’t in a running bond, so that was kind of cool, but definitely harder and more time consuming.    I’m also going to throw in a picture of a pretty cool backsplash/accent wall I did for the same guy at  different project because it was pretty cool.

World Forestry Center bench at Cheatham Hall-September 2024

This fun project was to replace a forty foot long bench outside Cheatham Hall at the World Forestry Center up by the zoo.  The old one might have been cool at one point, I’m sure the carpenters that built it were pleased with themselves for it’s clever construction, but it was in utter disrepair, it was hard to maintain (painting in between the slats), and honestly, it just kind of looked like something you’d see at a condominium complex from the 80’s.

Much to my relief, they did not want the same thing again, so the question was what should it be.  After going through a few options in my head, I arrived on three 4×6 of some kind of weather resistant wood.  This would maintain the original seat height and width, would be easier to maintain, and if the wood was pretty, would look cool.  My initial thought was cedar, but then I remembered that cedar is a bit soft and we live in a society of maniacs and hooligans that are happy to ruin nice things, or at the very least unwilling to be inconvenienced in the slightest to not ruin nice things, so something a little more robust might be in order.  I thought maybe redwood, which is similar to cedar but a bit harder, but that’s really hard to find.  There’s a place in Eugene that does redwood, but they told me that while they had the wood I needed, it was really green (not yet sufficiently dry) and wouldn’t be available for at least a month.  So back to cedar.  I came to the conclusion that if someone was intent on doing it harm, I could make it out of steel plated diamonds and they’d still find a way, so I couldn’t let that be the determining factor.  

    If you want nice cedar in Portland, don’t go to a lumber yard or big box store, go to Custom Cedar Products on 163rd and Sandy.  The worst piece of wood there is better than the best piece you’ll find at Home Depot.  They also helped me out cutting some larger stock down to what I needed and had it ready in time for my start date.  Solid place.  And the wood was absolutely beautiful and nicely milled.

Lest you think I’m only an amazing carpenter, I’m also a world class draftsman.  Here’s the plan I sent the Forestry Center.

Each one of those timbers was expensive, so I wanted to do it right the first time.  I got a sheet of plywood that I cut into 5 1/2 inch strips (the width of a 4×6) and the plan was to make a template for the middle row to assure that it was centered on the posts and then use that row to determine the front and back rows.  As an added bonus, while demoing the old bench, I found a yellow-jacket nest with my right hand.  

Once everything was cut to size and installed, I filled some knot holes with something called CA glue, basically super glue, rounded over the exterior edges a little, sanded everything down, put some end-grain goo on the ends to deter splitting and applied some Sun Frog cedar tone stain/finish to it. 

I really like how this turned out! I think it’s reasonable to point out that the really pretty wood and nice stain is doing the majority of the work in making this look good, but we’ll call it a team effort.  The Forestry Center wanted to rename the place Cedar Bench Hall* but I was like “No, I’m sure that Cheatham guy was cool, just keep it like it is”, and they reluctantly agreed.


*no they didn’t.

Fireplace mantel and tile- July 2024

The project started out with the client wanting to do something to snazz up their ugly brick fireplace.  They didn’t know exactly what, they just wanted it to not be an eyesore.   

Their initial thought was just tile, but it would have seemed weird to not have a mantel, and I was envisioning something with legs, something that looked built in like it had always been there.  They thought that sounded fine, and I sent them some options, pictures I’d grabbed from the internet, to see what might appeal to them.  Also, they had an old run down outbuilding that had an old work bench in it, so I pitched them the idea of something pretty rustic made out of the old bench.  I don’t think they totally got what I was talking about, but they said sure.  

It would have been nice to match the tile in front of the fireplace, but that was like a hundred years old and unlikely to be available.  I went to Hippo Hardware just to see if I could find anything close, and I could not, but what I did find was these little 4″ slate tiles, and I thought that would go well with the plan, so that’s what we did.  

I sent her this mock-up to show her kind of what it would look like when done. 

I carefully demoed the bench and scrubbed it down with just dish soap and a bristle brush. 

The plan was to build a fake beam that was held up by fake timbers.  

Next, I filled some of the bigger holes and cracks with epoxy mixed with walnut sanding dust, and sanded everything down until it was smoothish.  I didn’t want to change the character of the wood by sanding too much, but that bench was so old and worked over it wasn’t an issue.  I finished it off with several coats of an off the shelf tung oil mixture.  

To install the mantel, I used these bolts that were a lag bolt on one side and treaded rod on the other.  I screwed four of the bolts into the framing, drilled corresponding holes into the top piece of the mantel, filled the holes with epoxy, and pushed it into place.  

I did a slight variation of this for the legs.  I drilled a couple of holes for each leg into the brick and use PLU construction adhesive to glue threaded rod in, and did the same to the legs.  I didn’t need these to bare the weight necessary for the mantel, I just needed them held in place, although I bet this stuff would have been just fine for the mantel as well because those things were rock solid after the adhesive cured.   

I briefly consulted with Fred the dog about this technique, and he felt it was sound.

I was initially just going to tile right over the brick, but once all the wood was up, I realized that was a dumb idea.  The brick wasn’t plumb and it wasn’t flat, two things you really want when tiling, so I decided to cover it in cement board first.

I was finally ready to tile.  Due to planning and a bit of luck, I didn’t need to cut any tile.  It was a little tricky because the tile wasn’t particularly consistent in size or thickness, but that was pretty fitting for the “rustic charm” of it.  

And here it is with the grout.  

And to finish evertyhing off, here it is with the transitions/trim around the floor tile.

And ta-da!  I was quite pleased with how this turned out.